Step 1
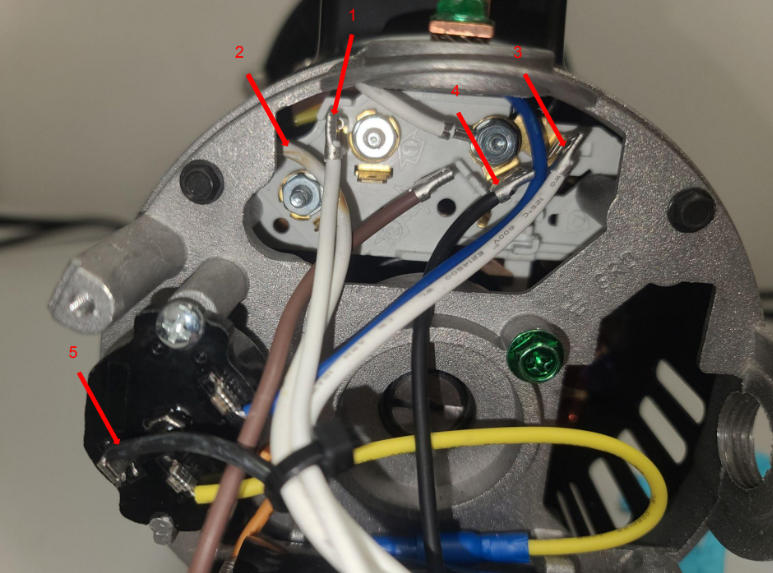
Use this Picture to Note the Numbers for the Wires
Step 2
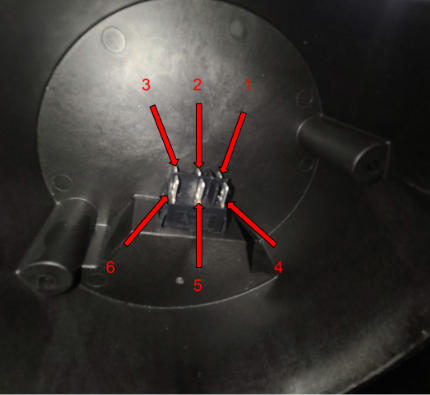
Use this Picture to Note the Numbers for the Switch Block
Step 3
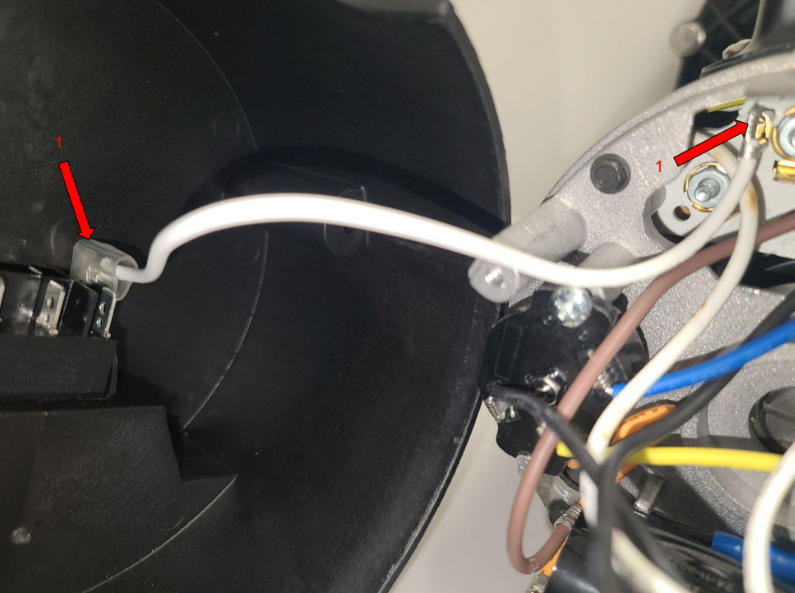
Connect wire 1 to terminal 1 on the switch block
Step 4
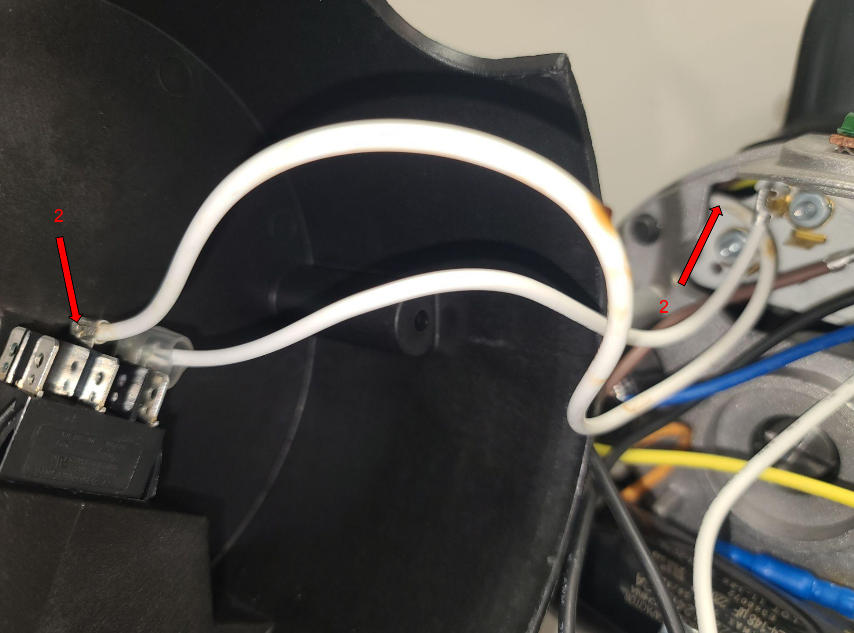
Connect wire 2 to terminal 2 on the switch block
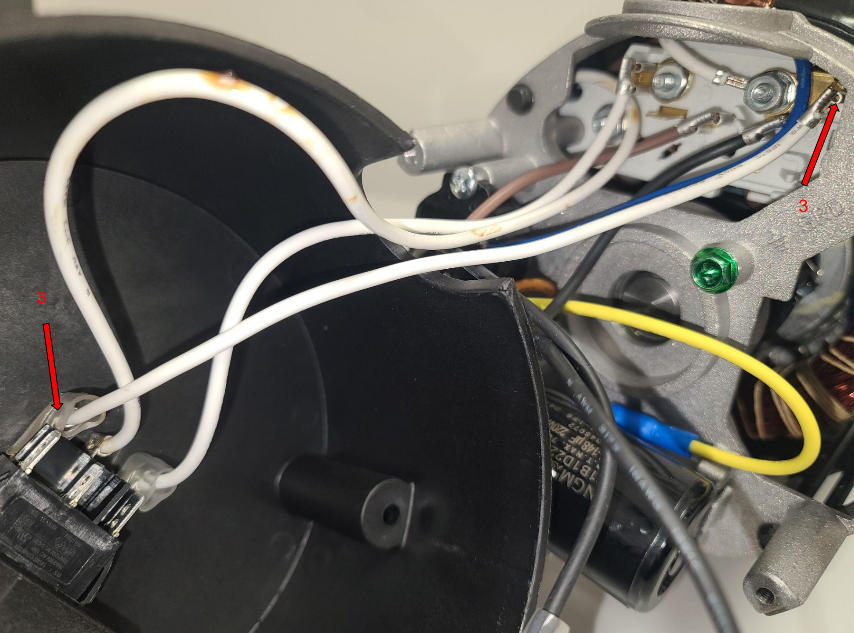
Step 5
Connect wire 3 to terminal 3 on the switch block
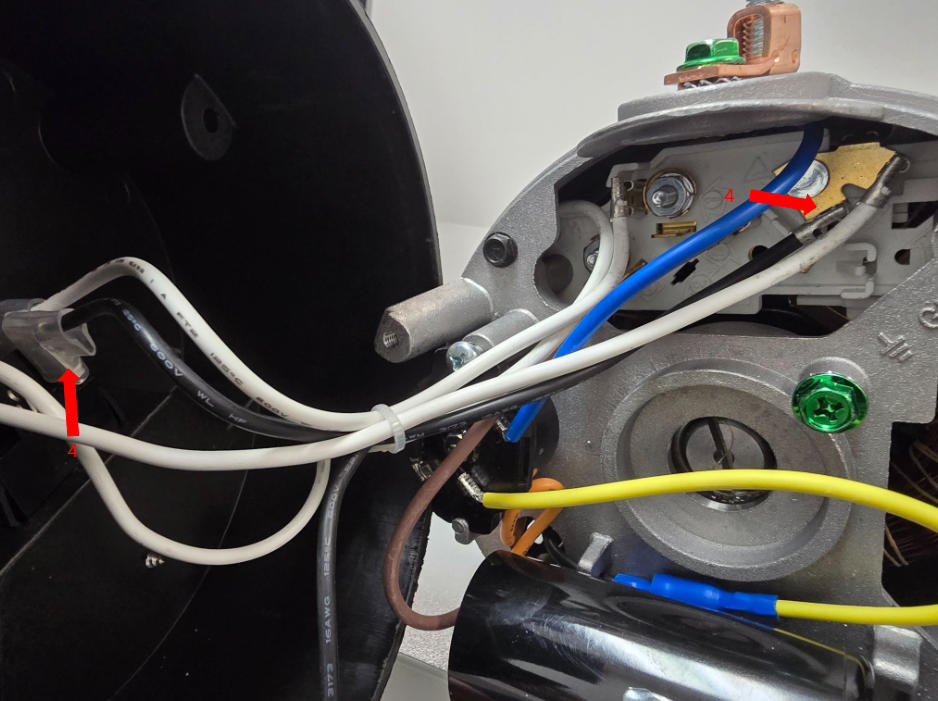
Step 6
Connect wire 4 to terminal 4 on the switch block
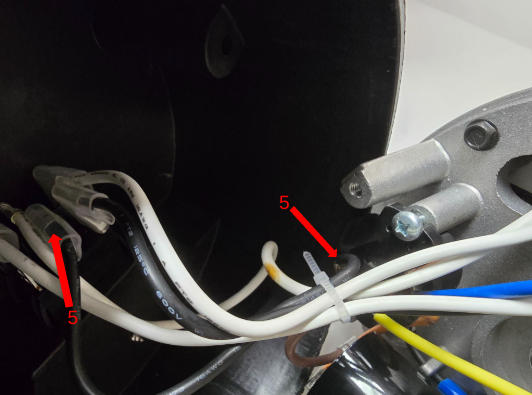
Step 7
Connect wire 5 to terminal 5 on the switch block

Leave a Reply