As pool technicians, we hear these everyday:
“My pump is on but the water is not moving.”
“Why is there water leaking from under my pump?
“Why is my pump losing its prime?”
And the classic but vague, “My pump isn’t working, what’s wrong with it?”All these and many others are signs of a failing pool pump but the source of the fault varies. The key to diagnosing the pump is understanding its parts’ functions and what happens when a certain part is failing. Knowing what to look for allows you as a homeowner to identify and fix the problem yourself, thereby saving money. Or if you’re not up for the job, be able to explain the issue to a pool technician so they can fix your pump. Most importantly, being educated on your pump prevents you from being pushed into buying unnecessary parts by your Poolman.
We’ll do a rundown of the 8 most replaced parts on a pool pump with an explanation of each part’s function and the symptoms of a possible issue.
1.) Motor
Symptoms
- Grinding or Screeching – A sign of bad bearings caused by age or rusting. Bad bearings are also a sign of a leaky shaft seal.
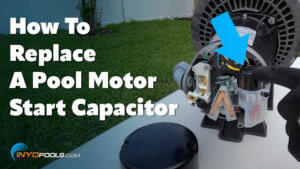
- Loud Hum – If the shaft is spinning then it is likely the capacitor failing. If the shaft is not spinning then the bearings have frozen and locked up the shaft.
- Flipping Breaker- A deep internal component within the motor has failed and requires the motor to be replaced or rebuilt.
- Silence – The shaft of the motor has frozen providing you with a new 30-pound paperweight. There is no chance of rebuilding the motor, the only route is to replace.
A pump’s motor is the heart of your pool. Put simply, if it’s not a pumping then you’ll be a slumpin’. Generally, motors have a lifespan of 3 – 5 years. The life of a motor can vary greatly upon the conditions it endures in its application. A motor exposed to the summer sun, spring rain and early fall freeze will likely burn out quicker than a sheltered one. If you’re concerned about weather effects, we suggest using the Universal Motor Cover to protect your investment.
The Fix: How To Replace the Motor on Your Pool Pump, How To Wire A Pool Pump,
2.) Seal Plate
Symptoms
- Obvious wear and tear, i.e. cracks
The seal plate is the joining point of the motor and the pump housing. Damage to the seal plate is usually caused by an over-tightening of either the motor or housing bolts. Excess tightening will cause cracks in the frame and eventually form leaks.
The Fix: Replace Seal Plate
3.) Gaskets & Seals
When someone says they are seeing wet cement on their pump pad, the usual cause is a bad gasket, shaft seal or o-ring. These rubber parts seal the joints of your pump making it watertight. Each seal failure will affect your pump in a distinct way. If your pump requires multiple gaskets replaced, we suggest applying a Gasket and O-ring Kit (GOKIT) if available. We also have a guide on installing a gasket kit: How To Use a Tune up / GO-KIT
Shaft Seal
Symptoms
- Water dripping from motor vents
- Loud bearings
- Rusty motor casing
- White whirling on motor face
Arguably the most vital and sensitive of the bunch, this $12 – 20 part is the last line of defense protecting your $200 electric motor. And I shouldn’t have to tell you but water and electric motors do not get along very well. The seal consists of two sides: a white ceramic ring sleeved in a rubber protector and a spring-loaded side with a carbon ring. If your shaft seal begins to fail, water will leak into the motor casing. This small leak will begin the process of corroding bearings, copper windings or electrical components. Friendly reminder, whenever replacing a motor always replace this seal.
The Fix: How To Replace a Pool Motor Shaft Seal
Housing Gasket
Symptoms
- Wet pump pad
- A leak coming from the seal plate and housing seam
The largest of the gaskets acts as the seal between the seal plate and pump housing. Diagnosing a faulty housing gasket is easy due to its location. If water is spilling from the large seam between the pump seal plate, then this would be your culprit.
The Fix: How To Replace Pool Pump Gaskets
Lid Gasket
Symptoms
- Large air bubbles in the strainer basket
- Low water pressure
- Takes longer to prime pump
“Why am I getting air in my system?” The answer to that question always begins with checking the lid o-ring of the pump. Unlike the other gaskets on the list, a bad lid gasket causes a sucking leak rather than a blowout. The usual sign of a bad lid o-ring is larger than normal bubbles in the strainer compartment. The air leak may also cause a hissing sound.
The Fix: How To Replace Pool Pump Gaskets
Diffuser Gasket
Symptoms
- Losing prime
- Low water pressure
This important but sometimes forgotten part, the diffuser, and its gasket enhance the pulling power of the motor and impeller, enabling the pump to prime itself. Located at the tip of the diffuser, the gasket seals the diffuser/impeller assembly to the front part of the housing. The funnel-like diffuser is then able to focus the impeller’s pulling energy, increasing its strength. This aids in priming and maintaining water pressure.
The Fix: How To Replace Pool Pump Gaskets
4.) Impeller
Symptoms
- Losing prime
- Low water pressure
The motor may do all the spinning, but the impeller does all the work. Found screwed onto the end of the motor shaft, the impeller is a vented or veined disk. These veins act as a boat propeller would, drawing in and then pushing out the water. If your impeller is broken then you will see little to no flow of water. There may be rattling as well caused by broken pieces of the impeller within the housing.
The Fix: How To Replace A Pool Pump Impeller
5.) Diffuser
Symptoms
- Low pressure
- Loss of prime
The diffuser is a cone-like shroud that sits over the impeller. Its main function is to focus the impeller’s pulling force towards the pool to enhance the water draw. A broken or cracked diffuser will have cracks that siphon off the impeller’s pull, lowering water pressure.
The Fix: How To Replace A Pool Pump Diffuser
6.) Strainer Lid
Symptoms
- Large air bubbles
- Obvious or hairline cracks
- Warping
The strainer lid is the main visual inspection point of your pump. Or in simpler terms, it’s where you check to see your pump is running. Lids become brittle with age and can break or warp from excessive sunlight. Hairline cracks in a cover can create a sucking air leak allowing air to slow your system.
The Fix: Replace Strainer Lid
7.) Strainer Basket
Symptoms
- Rattling noise within strainer basket
- Clogged impeller
- Torn or damaged cartridges
The strainer basket catches debris before it reaches the guts of the pump. A broken basket can harm your pump or filter because it misses debris that can damage the impeller, diffuser or filter cartridges.
The Fix: Replace Strainer Basket
8.) Housing
Symptoms
- Dry rot
- Cracks forming near ports or bolt holes
- Obvious wear and tear
Considered the hull of the pump, a housing encases all of the above parts. A pump housing failure is usually seen coming because of the obvious long-term degradation of the pump. The sun is usually the biggest culprit when it comes to housing damage. The pump getting baked during the summer months will cause the housing to start petrifying and becoming brittle. Cracks will begin to show around the stress points. The housing is the second most expensive part on a pump to replace, only behind the motor. If the housing and a few other parts need replacing, it may be best to replace the whole pump. Read our previous blog on determining what to do in this case: Pump or Motor: To replace or not to replace… That is the question.





Leave a Reply