Let’s be honest, a pool is a great fun feature for the whole family but what’s the point of having a pool if you can’t show it off? Pool paint is still one of the most popular and cheaper ways to cover your pool surface. It provides a clean and crisp environment for your pool come party time. Over time, paint will fade and in some cases, bubble, and what was once your beautiful backyard pool has become what looks like a bad summer neighborhood hangout.
Sometimes this happens due to negligence or simple forgetfulness. Sometimes, you inherit these problems when you purchase a new home. Regardless of how the problems arose, the main goal is to get your pool in pool-party shape. After helping thousands of customers, we’ve compiled the most common problems pool owners encounter with their painted pools.
Blistering/Bubbling

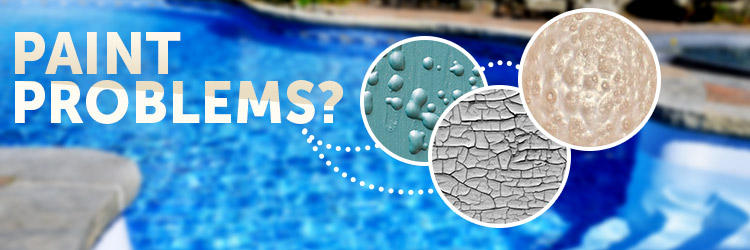
Blistering is the formation of little bubbles along the surface of your pool paint. There are two different causes to blistering, heat and moisture. Whenever you paint your pool, you should always follow the manufacturer’s guidelines from start to finish. Painting your pool in direct sunlight, on a warm surface, causes heat blisters. What’s happening is, the film dries too quickly, trapping solvents inside. These solvents then vaporize, forcing pressure against the top coat of the paint causing blistering. This is more common in darker colors, as they absorb heater a lot faster than lighter ones.
Blistering can also be caused by moisture. The major cause of exterior paint blistering is the interior moisture in tightly constructed homes. In essence, there is no place for this moisture to escape but through the walls. During the summer, the sun heats the side and the water trapped behind the paint eventually evaporates. Again, causing bubbles.
Solution
Before you’re able to fix the bubbles, you first have to determine which type of blister you have: one caused by heat or moisture? Break open one of the bubbles. If you see another layer of paint, the bubble was probably caused by heat. If it is bare, then moisture is probably the culprit. In both cases, sand and scrape peeling paint to bare, prime exposed areas, and repaint.
In heat blistering, the prime coat is generally not affected and can simply be repainted without priming.
Cratering/ Foaming
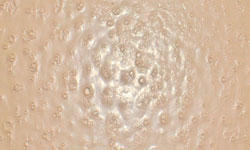
Craters are tiny depressions in dried paint film. They are caused by trapped pockets of air in wet paint film. These depressions can occur shortly after the immediate coat or topcoat has been applied. They are also caused by excessively stirring or shaking the paint before applying, using an incorrect roller, applying too many coats, or applying paint to a porous unprimed surface.
Solutions
All craters should be sanded out and surface repainted. If they are not removed before the new coat is applied, the craters will still show through. When using new rollers, completely immerse them in paint and roll them out a few times before using. This expels all the extra air in the brush. Do not repeatedly shake your paint cans. After a can has been shaken, let it sit until all the bubbles and foam disappear.
Alligatoring

Alligatoring is the term that describes when the surface painted is cracked and develops an appearance that resembles the skin of an alligator. Alligatoring is caused when the topcoat fails to bond smoothly to the coat beneath. Sometimes a glossy finish is quite difficult to provide a good, necessary bond. Adversely, applying an extremely hard coating over a softer primer can also result in alligatoring.
Solutions
Completely remove old paint by scraping and sanding. Power washing can be used for larger areas. Next, prime the area with a high quality latex or an oil primer and paint with either oil or acrylic latex house paint.
Brush Marks
Brush marks are marks that are left imprinted in the dried paint film. They are caused by poor quality applicators. If the filament of a brush is not finished properly, it will leave marks. Other causes include: top-porous surface, applying too little paint, using the wrong type of thinner, not allowing the paint to dry in between coats.
Solutions
Whenever possible, always use top-quality applicators. Your brush should contain bristles that are properly flagged and tipped. First smooth surfaces by sanding before repainting. If you see that the surface is still too porous, apply a primer before repainting.





Leave a Reply