– BLOG UPDATED 9/25/17
Some pool owners have a misconception that throwing shock into the pool and owning a salt chlorine generator forfeits you from having to deal with chemicals again. Unfortunately, this is not the case. Yes, you will worry less about certain chemicals, but the importance of a well-balanced pool remains.
Before attempting to operate your new saltwater chlorine generator, there are a few steps every pool owner should follow to ensure the best use of your system. Did you know that before you even operate your unit, salt must be added to your pool? Actually, you should evaluate your pool’s water chemistry as a whole. A properly balanced pool is not only essential to the performance of your chlorine generator but also important in protecting your pool equipment and swimmers from other potentially dangerous situations.
To help out new salt chlorine generator owners, we’ve created a chemical quick start guide before operating your chlorine generator.
STEP 1: Calculate Pool Volume

One of the first things you should become very familiar with is how many gallons of water your pool holds. This information is used frequently when trying to size your equipment correctly for your pool and when you’re adjusting chemical levels.
You can determine the number of gallons of water in your pool by using the formulas to the left. For non-standard shaped pools, it may be easier to break your pool into sections to calculate. Then, simply add all the sections for a total amount.
STEP 2: Adjust Your Salt Levels
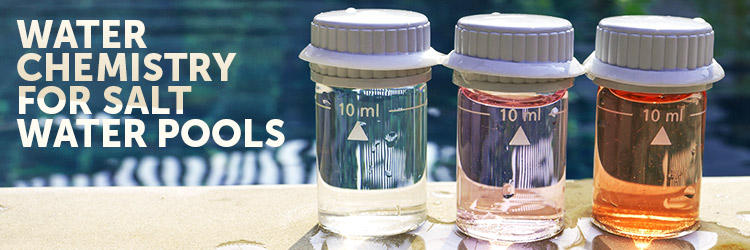
 Before you do any adjusting to your salt levels, you first have to determine how much salt is currently in the water. We offer various pool water testing equipment on our site that you can purchase that will assist you in testing your water. The recommended salt levels are between 2700-3400 parts per million (ppm), with the ideal level being at 3200 ppm. (Some systems may require a higher minimum level. Check your manual for specifics)
After testing the salt, determine how much you need to add until you reach the 3200 ppm mark.
Salt chlorine generators may indicate low salt sometimes and it prompts pool owners to add more salt. Then, once they test their levels, their salt PPM is extremely high. The reason this happens is due to a failure in the salt cell. Failure in your salt cell can trigger false readings. To ensure proper levels, always, always, always test your pool water. A simple water test can tell you where your pool water stands as a whole allowing you to make adjustments accordingly.
 STEP 3: Adjust Cyanuric Acid
Cyanuric acid (stabilizer) is essential to the performance of your chlorine generator system. Cyanuric acid is a mild acid that helps prevent the breakdown of chlorine due to the sun’s ultraviolet rays. If you live in a region where the sun is a frequent visitor, you may want to pay close attention to these levels. For cyanuric acid, the ideal level for outdoor pools is 60-80 ppm, while for covered pools it is 20-40 ppm. The ppm for indoor pools should be 0, as there is no need to add stabilizer to a pool not affected by the sun.
STEP 4: Adjust Free Chlorine
You should test and monitor your available free chlorine levels on a weekly basis. Free chlorine levels should remain between 1-3 ppm. You can lower your free chlorine by reducing the output setting on your generator. Also, consider increasing the pump runtime if you cannot maintain a high enough FC.
STEP 5: Adjust Total Alkalinity
The total alkalinity (TA) measures the total alkaline substance in your pool water. Alkalinity is the name given to the capacity of an aqueous solution to neutralize an acid. The ideal level for TA is 60-80 ppm. The results of improper TA levels range from corrosion of metal pool parts, staining of your pool, burning and itchy eyes, cloudy water, and reduced chlorine efficiency. You can increase the pool‘s TA using sodium bicarbonate (baking soda) and decrease the TA using muriatic acid
 STEP 6: Adjust Calcium Hardness
Calcium hardness is the measurement of the total amount of minerals that are found in your pool’s water. If you’ve heard the phrase ‘hard water’, it is simply referring to a high mineral content. Ideally, your total hardness should fall between 200-400 ppm, however, it may vary if you have a fiberglass or vinyl pool. Too much calcium hardness causes scaling in your pool and too little causes your pool water to become corrosive. While drinking ‘hard’ water is not necessarily harmful to one’s health, it can pose serious problems to your pool equipment.
- 50-300 ppm for vinyl (Do Not Add)
- 220-320 ppm for fiberglass
- 350-450 ppm for plaster
 STEP 7: Adjust pH
pH is the measure of how acid/alkaline the pool water is. Pools with a pH of less than 7 are considered acidic. The ideal pH level for your pool is 7.2-7.8. If your pH is too low, the water can become corrosive to your pool equipment. If your pH is too high, the chlorine becomes much less effective for sanitation. Pools with salt systems tend to have a higher pH level. Because of this, you will probably be adding a little more acid to your pool than most traditional chlorine pools. If you don’t keep your pH levels in check and they continue to rise, calcium scaling along your tile walls begin to develop. Additionally, calcium scaling also affects your saltwater cell, thus shortening the overall lifespan of the cell itself.
Water chemistry for saltwater pools slightly varies from traditional chlorine pools. If you need advice on balancing your saltwater pool, post your results in the comments section and we’ll do our best to help you get your pool balanced.





Leave a Reply