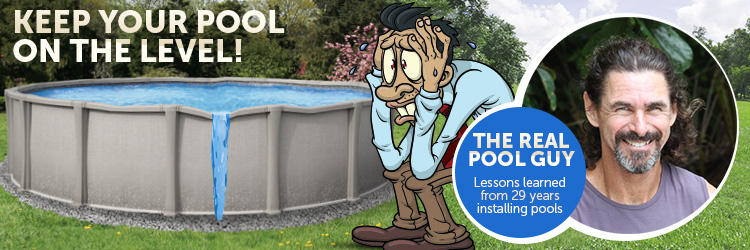
Over the years I’ve seen my share of horribly built above ground swimming pools. Many of them were severely misshaped, all their uprights leaned to the side and the resin connectors were cracked and did not hide the screws. The biggest way to mess up an above ground pool installation, though, is for it not to be level.
The most “off level” an above ground can get is around three to four inches off. This means when the pool is filled, on the one side the pool structure is three or four inches higher above the waterline than on the other side. Chief Obvious nature fact: Water is always level with the earth. Since water can only be level, an “off level” swimming pool will look really bad when you fill it.
I don’t usually see above ground pools that are off more than four inches, because they will almost always cave in when the level is off by more than that. Most above ground installation manuals will say that a pool should be level within an inch, but I try to get it level to an eighth of an inch or so. Above grounds with liners that have patterns or tile lines will start to look “off level” at about the half inch mark as the naked eye can compare the level pool waterline against the pattern of the liner.
How an Above Ground Pool Is Leveled
Traditional above ground swimming pools are leveled at their bottom track. This is the track that the pool’s wall fits into. So, if the track is level, then so is the wall. Most do-it-yourselfers will go on YouTube and find that most videos show how to level the entire bottom area of the pool. They will show this using some makeshift long leveling tool made from two-by-four wood nailed together according to the length needed to span the radius of the pool’s size. They then tape a two or four-foot level to the wood so they know when it’s level and attach one end to a piece of wood that’s hammered into the earth at the very middle of where the pool is going. At that point the long two-by-four wood can swivel in 360 degrees from the center pivot point and can be used to level the earth.
This leveling method does work to level the earth, but it is time-consuming and ultimately not very accurate in leveling what’s really important to level which is the bottom track. The bottom of an above ground pool doesn’t have to be level. Some will “dish out” the bottom of their pool so it is gradually deeper in the very center and that’s cool as it may make it easier to maintain the pool later on.
The reality is that it is much more important for the pool’s bottom to be smooth instead of level. The above-mentioned long two-by-four leveling method does very little at making the pool bottom smooth as the smoothing is done later on after the wall is up and the bottom coving is built or installed.
Leveling the Pool’s Bottom Track
When I started building above grounds in the eighties, we didn’t use blocks for leveling. We would just level the earth and lay the track down and roll out the wall. The result was some of those pools were pretty “off level”. Today every pool installer uses some kind of blocks for leveling the track and we place a block under every one of the bottom track connectors. I’ve seen people use all kinds of things for leveling blocks from cutting pieces of small pressure treated wood (not recommended) all the way to full 8”x8”x16”concrete blocks buried (also not recommended). Most do-it-yourselfers use too big of a block for this as they think the blocks have some structural value and they don’t. I use 6”x6” standard thickness square pavers.
CAUTION: SIDE RANT AHEAD
When I explain that the blocks under the track have no structural value, some homeowners look at me sideways and don’t believe or agree with me on this. If you work  in computer science or are an engineer of some kind, chances are you won’t agree with me as these two professions must attract the overly intellectually arrogant. In this case, it doesn’t matter if you are wrong, as it won’t hurt anything to overbuild. You can spend your whole week digging and leveling giant unnecessary pieces of concrete materials. I’m sure your body needs the exertion and your soul will enjoy being outside for a change. Certainly there is value in everything we do.
Anyway, when leveling the blocks under the track, people do it in two ways. Most will lay down the pool’s bottom track, shape it and somehow mark where the connectors are and then take the track out of the way so they can level the blocks. Some will keep the track in place and level the blocks underneath. This is tricky as the track will get in the way of leveling the blocks. The latter is the method I use.
What to Use to Level the Blocks
Most people will use a four-foot level and starting with the first block, will level from block to block all the way around until all blocks are the same level. This is hard to do as the distance between the track connectors (which is where the blocks go) is more than four feet long. To make up the difference, some will tape their level to a five foot 2×4 so it will reach from block to block.
Personally, if I were using a four-foot level to level the blocks, I would leave the track in place and put the level on top of the track. This will allow you to level farther than the four-foot length of the level as the track covers the longer distance from connector to connector. This is also more accurate as you are now leveling the actual track and not just the blocks. Confused yet? Sorry. This will make more sense when you are doing it instead of just reading about it.
The Ultimate Leveling Tool
Years ago I used a four-foot level to level pool tracks, but eventually graduated to using a builder’s level instead. Hand levels work well, but the drawback is you are leveling from block to block which means you are using a different point of reference every time. This can result in the blocks not being all the same level. You’ll know how level or off you are when you finally level that last block with the original first block you started with. Often the blocks will be off and will have to be redone using this method.
A builder’s level or transit uses the same point of level reference every time. This means the blocks will all be the same level the first time. It does take two people to do this, though, as one has to look through the level while another is leveling. You could rent a 360-degree laser level and do it on your own if you don’t have any good friends.
In conclusion, just remember that it’s the bottom track that has to be level and not the ground inside the pool. Get that bottom track level and the right shape and the whole pool will look good and last longer no matter how bad the pool’s bottom looks or feels.





Leave a Reply