This week in Florida the temperature reached the 70s. Yup, the 70s. You know what that means, right? It means summer is ending, fall is near, and the pool season is coming to a close. Luckily for us Floridians, we can stretch out our pool season for at least a few more weeks. However, our northern pool owners should start thinking about beginning the process of closing and winterizing their pools. Even pool owners in the South should take precautions to protect their pool equipment. Pool owners in the South are not exempt from water freezing temperatures.
The closer we get to winter, the more calls we receive about the the winterizing process. This is great news. It means pool owners are taking the necessary precautions to protect their pools. Although not a daunting task to complete, winterizing your pool the correct way is necessary to protect your pool and pool equipment from freezing. It also saves you time and money in the spring when temperature rises again.
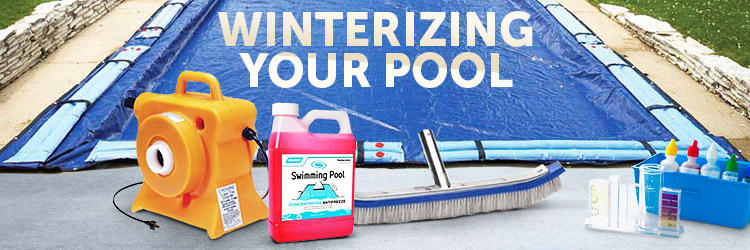
To help with the winterizing process, we’ve compiled a checklist that pool owners can follow to ensure their pool is closed properly.
Step 1: Balance/ Adjust Chemical Levels
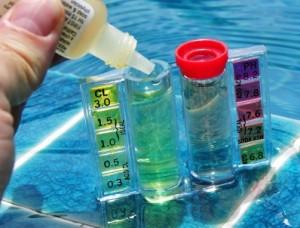 The very first thing you need to do is to balance all the chemical levels in your swimming pool. Make sure your pH, chlorine, and total alkaline levels are stable. Definitely make adjustments if necessary. You can purchase a quick test kit online or locally to perform quick and simple water tests. We also recommend you shock the pool to prevent stains from occurring. The reason you need to balance your pool before closing it is simple- you want to start the spring off fresh. Literally. There is nothing worse than delaying opening your pool because you have to spend weeks (and money) trying to balance your pool.
Step 2: Manage Your Water Levels
One of the first instincts as a first- time pool owner is to empty the pool completely during the winter. Please do not. Let’s say for a second that you do. As the water in the soil freezes, it expands. The expansion of the soil underneath your pool can literally pull the pool out of the ground. The weight of the water keeps the pool in place. This is also the same during a heavy storm.
*TIP*
If you live in a freeze area, drain your pool 4-6” below the skimmer.
If you live in a non-freeze area, keep your pool filled to the top.
Step 3: Clean Your Pool 
Next, you need to get down and clean your pool. No, I’m not talking about just turning on your automatic cleaner and letting it perform its magic. We recommend you take the time to not only vacuum your pool, but sweep and scrub your pool walls and skimmer baskets as well. If you only own a cleaner, you might want to consider buying a telescopic pole with a scrubber on the end. We all have those little, dirty areas in our pool that we sometimes wish we paid more attention to. This is the perfect time for it. Taking this extra precaution prevents future algae buildup and preserves the overall aesthetic of your pool.
Also remember to remove all floats, toys, ladders, and diving boards from your pool area. Store them in a safe place until you’re ready for them once your pool reopens.
Step 4: Backwash Your Filter
Before you begin the backwashing process, allow your pool pump to run a complete cycle. On average, it should take approximately eight hours to cycle your entire pool. After you backwash your filter, make sure you open both the drain at the bottom of the tank and open air relief valve (if you have one). This allows all the water in the tank to drain. If you’re uncertain about backwashing your filter, check out our how to guides on how to backwash your sand filter and how to backwash your d.e. filter.
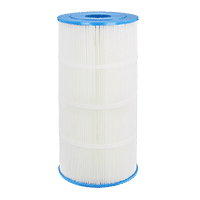
Cartridge filters: Remove and inspect your filter cartridges. You can use a regular garden hose to rinse it off. At this time you can gauge whether or not replacing them is appropriate.
Sand filters: Backwash your filter as normal. It is highly recommended that you replace the sand in the tank now as opposed to when you reopen your pool in the spring. Keep your valve in the “WINTER” position afterwards.
DE filters: Much like sand filters, backwash your filter as normal. If your DE grids need to be replaced, this would be the perfect time to do so.
*TIP*
We recommend you wait until Spring to acid wash your filter. When you acid wash your grids and then let them sit for a few months, you run the risk of them being destroyed by the hardness of the acid.
 Step 5: Blow Pool Lines
Of all the steps, this one is essential to maintaining your pool’s overall wellness. If you fail to blow out your lines and the temperature is at freeze level, it can (and will) destroy your piping and equipment. You can use a simple shop vac to blow your lines. You would blow water from the skimmer, through the equipment, back into the pool. Make sure you remove any directional fittings and install a freeze plug. Pumps, filters, heaters, and chlorinators should be drained. For extra insurance, you can flip your pump upside down and dump any excess water. Don’t forget to remove all drain plugs as well. You can close all exposed holes with a plug.
*TIP*
You can use some antifreeze in your water to help prevent the water from freezing. Keep in mind, this is NOT the same antifreeze you use in your car. DO NOT USE AUTOMOBILE ANTIFREEZE.
To avoid losing any. store all your plugs in the pump basket until next season.
Step 6: Shut Off Pool Equipment
Don’t forget to turn off all your pump equipment. You don’t want to leave something on accidentally. Better be safe and check it off your list.
Step 7: Cover Your Pool 
As you may know, there are several ways you can cover your pool. You have standard winter and mesh covers, leaf covers, and safety covers. We recommend you use a combination of the two to protect your pool. Whichever method you choose, make sure you utilize it during the winter. A lot of the hard work leading up to this point could be forfeited if you do not cover your pool.





Leave a Reply