

Opening a pool after winter is one of those jobs that’s easy to rush and easy to do right. The difference is just following the steps in order. Here’s the full procedure:
Before You Start
Gather everything you’ll need ahead of time:
- Start-up chemical kit (or individual chemicals)
- Test kit or test strips
- Pool brush and vacuum
- Garden hose
- Replacement O-rings and lubricant (good time to inspect them)
- A helper, if possible, can be awkward alone
Step 1: Remove and Store the Winter Cover
- Pump or bail standing water off the cover before removing it. This keeps dirty water from dumping into the pool.
- Remove the cover carefully, keeping debris on top from falling in
- Rinse the cover thoroughly, let it dry completely, then fold and store it in a bag or container away from rodents and UV exposure
- A dirty or damp stored cover won’t last as many seasons
Step 2: Remove Winter Plugs and Reinstall Equipment
- Pull the expansion plugs (Gizzmos) from your skimmer(s) and return lines
- Reinstall your drain plugs on the pump, filter, and heater. These were removed to prevent freeze damage
- Reinstall your pressure gauge, sight glass, and any valves that were removed or closed for winter
- Reconnect any equipment that was disconnected: heater, chlorinator, automation system
Step 3: Top Off the Water Level
- Your water level likely dropped over the winter.
- Fill to the middle of the skimmer opening. This is the optimal operating level.
- Don’t run the pump until the water is at the right level
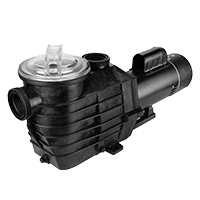
Step 4: Reassemble and Prime the Pump
- Reinstall the pump drain plugs and lid O-ring (inspect and lubricate the O-ring, replace if cracked or flat)
- Fill the pump basket with water to help it prime
- Open all valves to their normal operating position
- Turn the pump on and watch for it to prime. It should pull water within a minute or two
- Check for leaks at unions, valves, and fittings immediately
Step 5: Check and Restart the Filter
Sand filter: Set to “Backwash” and run for 2–3 minutes, then rinse for 30 seconds, then switch to “Filter.”
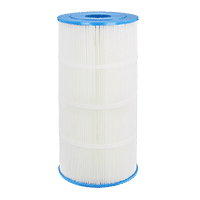
Cartridge filter: Inspect cartridges to see if they have gone into winter dirt. Now is the time for a deep soak clean before reinstalling.
DE filter: Reinstall grids if removed, backwash, then add fresh DE through the skimmer
Check your pressure gauge, note your clean starting pressure for reference throughout the season.
Step 6: Inspect Equipment While It’s Running
With the pump running, walk through everything:
- Pump: Running quietly? No air bubbles in the basket lid? No leaks in the housing?
- Filter: Pressure normal? No leaks at the clamp or unions?
- Heater: Fire it up and verify it ignites and holds temperature
- Chlorinator/feeder: Inspect for cracks, reinstall properly
- Returns and skimmers: Water flowing normally through all returns?
- Automation/timer: Reset schedules and clock if needed
Step 7: Remove and Clean Winter Accessories
- Pull out any winter floats or ice compensators from the pool
- Remove skimmer baskets, clean them, and reinstall
- Clean out the pump basket
Step 8: Brush and Skim the Pool
Before adding any chemicals:
- Skim all floating debris off the surface
- Brush the walls, steps, and floor thoroughly. This loosens any algae or scale that settled over winter.
- Vacuum to waste if there’s heavy sediment on the floor (vacuuming to waste bypasses the filter and removes dirty water directly, better than filtering heavy debris)
Step 9: Test the Water
This is where you find out what winter did to your chemistry. Test for:
- Total alkalinity – adjust first, target 80–120 ppm
- pH – target 7.4–7.6
- Calcium hardness – target 200–400 ppm
- Cyanuric acid – target 30–50 ppm (if you use stabilized chlorine or live in a sunny climate)
- Free chlorine – target 1–3 ppm normally, but you’ll shock it shortly
- Phosphates – worth testing at opening; high phosphates feed algae
Use a liquid reagent test kit for your opening test. You want accurate numbers before adding chemicals.
Step 10: Balance the Chemistry in Order
Add chemicals in this sequence, running the pump between each addition:
- Adjust total alkalinity first (sodium bicarbonate to raise, muriatic acid to lower)
- Adjust pH (soda ash to raise, muriatic acid to lower)
- Adjust calcium hardness if needed
- Add cyanuric acid if needed (takes 24–48 hours to dissolve fully)
- Shock the pool use a large opening dose, typically 2–3x your normal shock amount. For a green or very cloudy pool, go higher. Shock at dusk so sunlight doesn’t burn it off before it works.
- Add algaecide (optional but recommended as a preventive at opening)
Allow the pump to run continuously for at least 24 hours after shocking.
Step 11: Run the Filter Continuously Until Clear
- Keep the pump running 24/7 until the water is clear
- Backwash or clean the filter as needed; it will load up quickly, processing all the opening debris
- Re-test chemistry after 24–48 hours and make any final adjustments
- Once clear, you can return to your normal pump schedule
Opening a Green Pool
If the water is visibly green, the process is the same but more aggressive:
- Vacuum debris to waste before anything else. Don’t filter it
- Use a triple or quadruple shock dose
- Run the pump and filter continuously, cleaning the filter frequently
- It may take 2–5 days to clear fully. Don’t get impatient, and add more chemicals before the process has time to work
- A clarifier or floc can help speed things up once the algae is dead
Tips to Make the Next Opening Easier
- Close the pool with balanced chemistry; it makes a huge difference in what you come back to
- Use a good quality winter cover that keeps debris out
- Consider a mid-winter algaecide dose if you’re in a mild climate
- Label your winter plugs so you know exactly where each one goes
The whole process typically takes a few hours of hands-on work spread over 1–3 days, depending on how the water looks. Take it step by step and don’t rush the chemistry; the pool will reward your patience.




Leave a Reply