With winter in our rearview mirrors, the time for opening our pools for Spring is quickly approaching. If the weather permits, we recommend opening your pool as early as possible. The obvious reason is to enjoy as much of your pool season as you can. The other reason is to give you time to inspect your equipment, balance your pool, and to address any issues that may occur with your pool equipment before getting into the heart of your pool season.
If you honestly do not have the time and have the money to spare, you can call a local pool company to come open your pool for you. I am sure there are a ton of qualified pool technicians in your area who would enjoy taking care of your pool for you. But, if you want to start your pool season off with savings, opening your pool for the spring is definitely something a homeowner can do themselves. To help you out, we laid out a step by step process that will walk you through opening your pool. We even created a downloadable checklist that you can print to take by your pool so that you don’t miss a step.
A pool that was properly closed and maintained during the winter months can help make opening the pool much easier. But, if you happened to miss some steps, that is okay too. That is just another reason why opening your pool as early as possible is beneficial to your system as a whole. If you follow each step accordingly, the process to opening your pool should be smooth. If you have any questions along the way, please do not hesitate to stop and give us a call.
Let’s get started.
Step 1- Getting Started 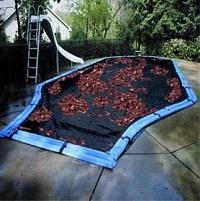
The first thing most pool owners want to do is to remove their pool cover. In reality, that should be the second thing you do. The very first thing you want to get out of the way is a simple cleaning. Remove or pump any leaves, debris, or water that may be sitting on top of the cover. Some water may get back into your pool and that’s okay, but you definitely want to limit the amount of debris going back in. Once your cover is cleared, you can remove the cover. Remember to clean the cover thoroughly before folding and storing it for the winter. Taking the extra ten minutes to store your pool cover properly will preserve the lifespan of the cover. You will also be much happier when it is time to close your pool again.
It may take two people to remove your pool cover safely, depending on the size of your pool.
How To Remove A Winter Pool Cover
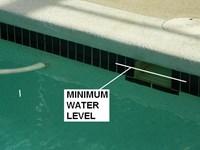 Step 2- Level Up
Once you have your cover off and stored, the next thing you should check is your water levels. You never really want an empty pool, unless you are doing some type of work to your pool. Your water should be filled to the middle of your skimmer.
This is important because your pump needs to draw water and not air when you finally turn it on. Trust us, you don’t want to see a pump that is drawing air. It’s not a pretty sight.
Step 3- The Equipment
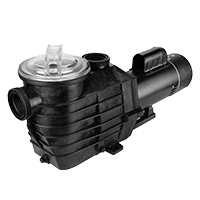
Once your water levels are good, the next thing you should focus on is your pool equipment. First, reinstall any plugs from your filter, pump, and heater that you removed during winter. Hopefully, you remember where you put them. Remember to put back any pump or skimmer baskets as well. Next, open your skimmers, main drains, and return valves. By moving your multiport valve to the WASTE position, you can clean out your lines from any unnecessary debris. Be sure to move the multiport valve back to the FILTER position before starting your pump.
Remember to keep your pump OFF while you are moving your multiport valve positions.
Step 4- Deck
Reinstall any ladders, diving boards, handrails, or deck fittings to your deck. Be sure to inspect each piece of equipment properly before installing. If you notice any cracks in your diving board, please do not install it. This can potentially be a safety issue.
 Step 5- Power
Next, prime your pump and turn on your pool equipment. You may have to turn on the circuit breakers in your home to restore the power. Ensure the filter’s air relief valve is open so it can release the air from the system. We also highly recommend taking the time to inspect your equipment properly.
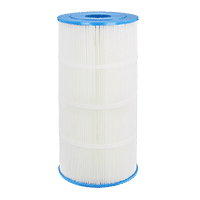
Check your pump and filter for any leaks or drops of water. Check your filter elements or sand to ensure they do not need to be changed before the season. Also, check to make sure you have proper flow throughout your system. If you have a D.E filter, you can add new DE powder if necessary. Ideally, this is the perfect time to address any issues you have with your equipment.
Step 6- Chemicals
It is important that your pool enters each season with a clean, healthy slate. Typically, you test the levels of the pH, chlorine, and total alkalinity in your water. To get an accurate reading, you should let your pump and filter run for a few hours before testing. It is best to sample water from the deep end while your water is circulating.
You can either test your water using a home kit, or you can take a sample of your water to your local pool store where one of their technicians will test it. We also offer a three-part series in our how to guide section that will help you maintain your swimming pool.
How to Maintain A Swimming Pool Part 1 (Chemicals)
How to Maintain A Swimming Pool Part 2 (Adjusting Chemicals)
How to Maintain A Swimming Pool Part 3 (Spring Start Up)
Some people enter the pool season with the attitude that maintaining, or even opening your pool, is hard work. I think that like most things in life, if you enter anything with a negative outlook, the results usually reflect it. Opening the pool should be easy and most importantly fun. Starting up your pump should be the foreshadowing of a bright and sunny pool season. If you run into any troubles, give us a call. We want to make your pool season as hassle-free as possible.
Since you’re not always by a computer or tablet , we have created a downloadable checklist for opening your pool for spring. You can download and print your checklist here. a4_checklist (1)




Leave a Reply